
Leisure Arts kindly sent over some product samples for this post (thank you so much!), and I have included affiliate links to some of their fairy garden products in the post below.
We’ve got a lot of snowbirds in the Midwest…those fortunate souls who have the means to migrate to warmer weather when winter hits.
That’s not us.
However, I have it on good authority that our garden fairy packs up her camper the minute she smells a snowflake. I didn’t want her to go too far this year, so I partnered with craft retailer Leisure Arts to build our fairy a glamping garden.
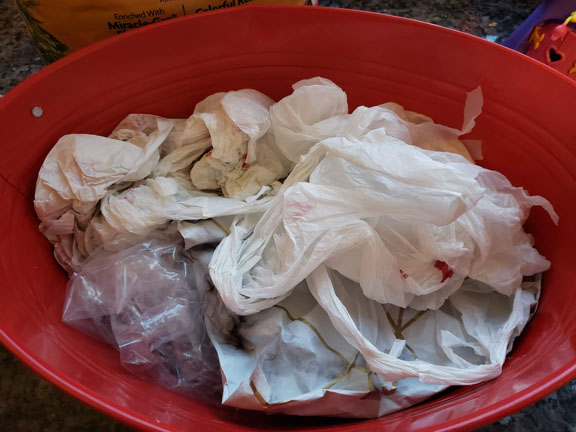
For the fairy garden base, you can use any sort of container that has a rim. Think broken pots, neglected serving platters, even discarded bakeware. None of which I had on hand. So after ransacking our house for something suitable, I gave up and went to Goodwill where I found a red metal tub for a dollar. And it had handles for portability, bonus!
I brought the tub home and filled it halfway with plastic grocery bags. Then I topped the bags with a layer of aluminum foil.
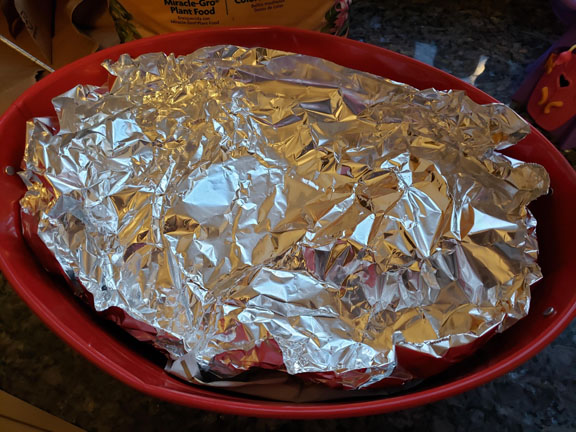
On top of the bags and the foil, I layered a paper grocery bag. Then I topped it all off with about two inches of dirt. I used a potting mix for succulents, because I happen to know that my garden fairy isn’t into high-maintenance plants. You would think that garden fairies come standard with green thumbs…mine decidedly did not.

Once the dirt is down, use scissors to trim off the excess paper, or just tuck it under.
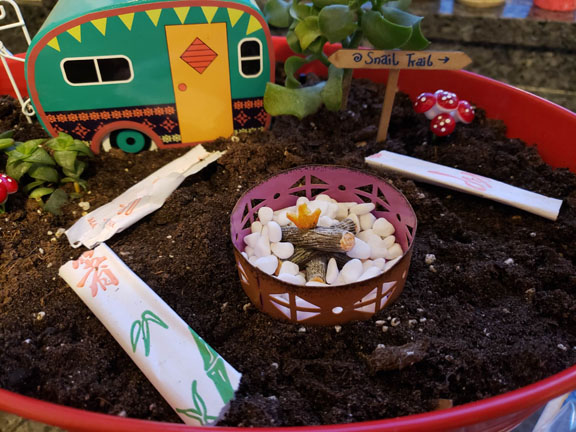
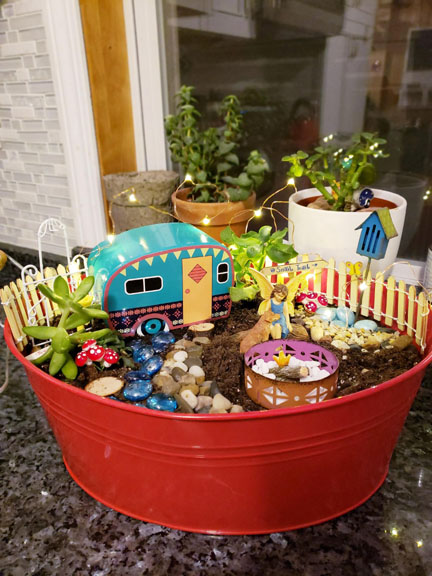
Now for the layout. Position larger items first. Leisure Arts was kind enough to gift my garden fairy a new cat-proof metal camper ($5.99) and matching campfire ($3.99). These two items were the focal points of our glamping garden, so I situated them first. Then I added a couple succulents to either side of the camper to add curb appeal and to provide our fairy with a little privacy.
Next, put down some pathways. Curving paths lend visual appeal, and enables our fairy to meander around her property. As you can see here, I used strips of paper to rough out the walkways.
Next, add your hardscaping: rocks, pebbles, glass stones, etc. Be creative! Best practices: keep a chopstick close at hand for pushing pebbles into place. Also, when working with pea gravel, outline the path with larger rocks to contain the gravel and to minimize overflow.
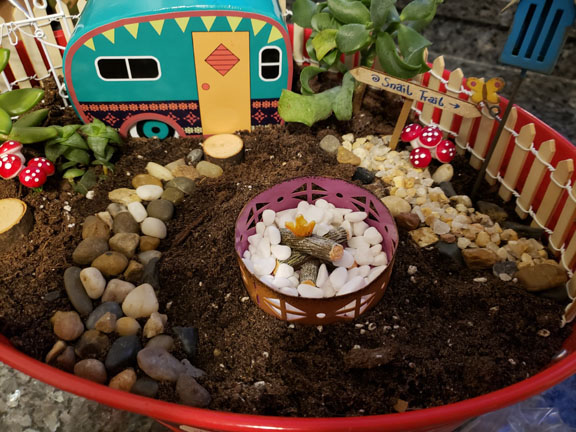
As you can see, I also added some fun red mushrooms, teeny tiny signage, and a fence. These adorable elements came from one of the Leisure Arts fairy garden kits. The kits have absolutely everything you would need to build your very own fairy garden, including tiny wooden stepping stones, gravel in various colors and sizes, cunning little hedgehogs and more. (Wait, what? Yes, you read that right.) The fence was especially wonderful, as I was able to cut it to size using a pair of scissors. There’s also a really well done book full of great ideas on how to make fairy houses and accessories from scratch! Click here to browse Leisure Arts’ fairy garden offerings.
As a final touch, I strung a string of fairy lights around the glamping garden, you know, for ambiance.
And that’s it! As of this morning, our fearless fairy officially relocated into her winter retreat. I can smell her campfire burning, and I believe she’s already planning a hike down Snail Trail later this afternoon. Do you have fairies in your garden?


I think my planters need some tiny hedgehogs and mushrooms! 😍 What a fun project.
SO cute and such a great read! 💜
PS I love the firepit 🔥
This is absolutely adorable. I really want to make one with my daughter!
Adorable. I love small projects that get done. Succulent plants are the best. No upkeep.